
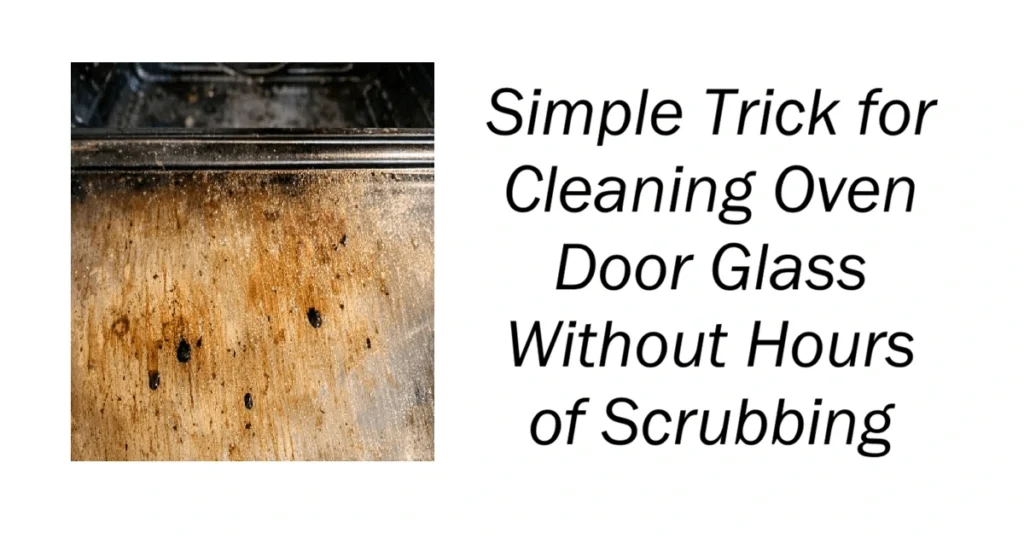
Simple Trick for Cleaning Oven Door Glass Without Hours of Scrubbing
I’m not usually someone who gets excited about cleaning hacks, especially the ones that promise “zero effort” but somehow leave me kneeling on the kitchen floor with three different sprays, two sponges, and a sore shoulder. Every now and then, though, I come across a shortcut that genuinely makes life easier. This is one of those rare finds.
The first time I tried it, my oven door had that stubborn brown haze covering the glass. You know the look: a cloudy, amber-coloured film that makes the entire oven appear dirty, even when the rest of the kitchen is spotless. I’d tried wiping it down with ordinary kitchen cleaner, but the baked-on grease barely budged.
That’s when my uncle shared one of his old-school cleaning tricks. He’s the kind of person who seems to have a practical solution for almost everything, and this time, his suggestion was surprisingly simple.
His method involved a dishwasher tablet, a little water, and some patience. The idea was to loosen the stubborn residue without spending ages scrubbing or buying expensive specialist products.
I was sceptical at first, but the results made me curious enough to look at oven-door cleaning a little differently. If your glass has developed the same brown, greasy film, here’s what you should know about this trick, how to approach it safely, and what to try if the stains refuse to budge.
1. Why Is the Brown Film on Oven Glass So Difficult to Remove?
That cloudy brown or dark amber layer on oven-door glass usually comes from a combination of grease, food splashes, smoke residue, and burnt-on food particles.
Every time you roast vegetables, bake a casserole, or cook something that bubbles and splatters, tiny amounts of grease and food can settle on the oven door. Repeated exposure to high temperatures gradually darkens these residues and makes them increasingly difficult to remove.
Unlike fresh grease, which often comes away with warm water and washing-up liquid, baked-on residue can become stubborn and firmly attached to the glass.
In my experience, the worst areas tend to be along the bottom edge and in the corners. These spots collect drips and splashes that may go unnoticed until they’ve been baked on several times.
That’s why an ordinary all-purpose spray doesn’t always deliver the results you’d expect. It may remove the surface grease while leaving behind the darker, more persistent layer underneath.
2. The Dishwasher Tablet Trick My Uncle Swears By
My uncle’s suggestion was to use a solid dishwasher tablet to tackle the brown film on oven-door glass.
The idea is straightforward: dishwasher tablets contain cleaning ingredients designed to help break down grease and food residue. With the right surface and cleaning method, those ingredients may help loosen some stubborn deposits.
However, there’s an important caveat. Dishwasher tablets are formulated for dishwashers, not necessarily for oven-door glass. Some contain abrasive ingredients, and their suitability depends on the glass, any special coatings, and the manufacturer’s cleaning instructions.
For that reason, I wouldn’t automatically recommend rubbing a tablet directly across every oven door. Check your appliance manual first and use an approved glass-cleaning method if the manufacturer advises against dishwasher tablets.
If your oven’s instructions permit this approach, test a small, inconspicuous area before proceeding. Avoid applying concentrated detergent to printed markings, coated surfaces, or the seals around the glass.
The appeal of this trick is its simplicity, but protecting the glass is more important than getting a quick result.
3. What You’ll Need Before You Start
If your oven manufacturer confirms that the method is suitable, gathering your supplies beforehand makes the job easier.
Here’s what I would keep nearby:
- One solid dishwasher tablet, if approved for the surface.
- A small bowl of warm water.
- Two soft microfibre cloths.
- A pair of cleaning gloves to protect sensitive skin.
- An old towel to protect the floor from drips.
A spray bottle filled with plain water can also be useful for lightly dampening the glass.
You don’t need boiling water. Warm tap water is sufficient for ordinary cleaning and helps avoid unnecessary temperature changes.
I also recommend keeping one cloth for removing loosened grime and another for the final wipe. Using a clean cloth at the end makes it easier to see whether any cloudy residue remains.
4. Choose the Right Cleaning Product
If you’re considering the dishwasher tablet method, remember that not all tablets have the same ingredients or texture.
Some contain enzymes, bleaching agents, alkaline cleaning ingredients, or abrasive components. These are useful in the dishwasher but may not be suitable for every glass surface.
A hard, compressed tablet is easier to handle than a liquid-filled pod, but that doesn’t automatically make it safe for oven glass.
Avoid using a product if its packaging or your oven manual warns against the ingredients or application. Never mix dishwasher detergent with other cleaning chemicals, and don’t use a tablet on a surface unless the manufacturer permits it.
If you’re unsure, a soft cloth, warm water, and a small amount of mild washing-up liquid are the better starting point.
5. Make Sure the Oven Is Completely Cool
This step is essential, whatever cleaning method you choose.
Always allow the oven and its door glass to cool completely before cleaning. A hot or warm glass panel can cause burns, and sudden temperature changes may damage the glass.
I prefer doing this job in the morning or after dinner, once the oven has been switched off for several hours and has cooled fully.
Place an old towel on the floor in front of the oven to catch drips. It’s a particularly useful precaution if you have wooden flooring or want to avoid leaving cleaning residue around the oven handle.
Before starting, check that the oven is switched off and follow any additional safety instructions in the appliance manual.
6. How to Clean Oven Door Glass Step by Step
Once you’ve confirmed that your chosen cleaning method is suitable, work slowly and avoid putting unnecessary pressure on the glass.
Step 1: Remove loose dirt
Wipe the glass with a soft, damp microfibre cloth to remove loose crumbs, dust, and surface grease.
This gives you a clearer view of the stubborn areas that need attention.
Step 2: Apply a suitable cleaning solution
For routine cleaning, use warm water with a small amount of washing-up liquid or an oven-glass cleaner approved by the manufacturer.
If your appliance instructions specifically permit using a damp dishwasher tablet, follow those instructions carefully. Don’t assume that a product suitable for ordinary glass is also suitable for coated or specially treated oven glass.
Step 3: Work on small sections
Divide the door into manageable areas rather than attempting to clean the entire panel at once.
Use gentle movements and allow the approved cleaning product to loosen the residue. Avoid vigorous scrubbing, particularly around the edges, printed markings, and seals.
Step 4: Wipe away the residue
Use a clean, damp microfibre cloth to remove the loosened grime and cleaning product.
Rinse the cloth frequently so you don’t spread brown residue across the areas you’ve already cleaned.
Step 5: Rinse and dry thoroughly
Once the dirt has been removed, wipe the glass again with a clean cloth dampened with plain water, following the cleaner’s instructions.
Finish with a dry microfibre cloth to reduce streaks and leave the glass looking clearer.
If some staining remains, repeat the approved cleaning process rather than increasing the pressure or reaching for an abrasive scouring pad.
7. Why Can a Dishwasher Tablet Help With Grease?
Dishwasher tablets are designed to help remove food residue, grease, and stains from dishes and cookware during a dishwasher cycle.
Depending on the formulation, they may contain ingredients that help break down greasy deposits and loosen food particles. This is why they can seem effective against certain types of kitchen grime.
However, oven-door residue isn’t always the same as the food and grease found on plates. Repeated heating can create stubborn deposits that require a different cleaning approach.
Some tablets also contain abrasive ingredients. While these may help remove certain residues, they can potentially scratch glass or damage decorative markings and coatings.
The important distinction is between loosening dirt and physically abrading a surface. A cleaning method that removes a stain quickly isn’t necessarily the safest option for the material underneath.
For that reason, use a manufacturer-approved product and gentle pressure rather than assuming that a harder scrub will produce better results.
8. How Much Effort Does It Really Take?
One of the biggest attractions of this cleaning trick is the promise of spending less time scrubbing.
The actual time depends on how dirty your oven door is, how long the residue has been there, and which cleaning product you’re using.
A lightly soiled glass panel may need only a few minutes of wiping. A door covered in several layers of baked-on grease could take considerably longer, particularly if you need to repeat the cleaning process.
I find that working in small sections makes the task feel much more manageable. Instead of attacking the entire door at once, you can focus on one area, wipe it clean, and see whether the method is working.
The best approach is to let an appropriate cleaner do the work rather than relying on force. If the residue doesn’t respond, switch to a product designed specifically for oven glass instead of scrubbing harder.
9. Common Mistakes That Can Make Cleaning Harder
A few simple mistakes can turn a straightforward cleaning job into a frustrating one.
Using too much water: Excess liquid can drip into the oven-door seams, vents, or other areas where moisture shouldn’t accumulate. Use only the amount recommended for your chosen method.
Scrubbing too aggressively: Excessive pressure and abrasive tools can scratch the glass or damage printed markings. A soft cloth and a suitable cleaner are generally safer.
Cleaning the entire door at once: Working in smaller sections helps you keep track of the residue and wipe away the cleaner before it dries.
Mixing cleaning products: Combining dishwasher detergent with other household cleaners can cause unwanted chemical reactions. Use one product at a time and follow its instructions.
Ignoring the manufacturer’s guidance: Some oven doors have special coatings or specific cleaning requirements. Always check the manual before trying an unfamiliar hack.
A little preparation can save you from having to deal with scratches, streaks, or damage that is much harder to fix than the original stain.
10. What to Do About Especially Stubborn Spots
The bottom edge of the oven door is often the most frustrating area to clean because grease and food splashes tend to accumulate there.
If the residue is particularly stubborn, begin with a cleaning product approved for your oven and allow it to work for the recommended amount of time.
You can also place a warm, damp microfibre cloth over a suitable stained area for a few minutes to help soften some surface residue. Make sure the cloth isn’t dripping wet and keep moisture away from the door’s seams and openings.
Afterwards, wipe gently and inspect the area.
Avoid concentrating pressure on a single spot, using steel wool, or scraping with a razor blade unless your appliance manufacturer explicitly provides instructions for a suitable scraper and surface. These methods can damage the glass or its coatings.
If the stain remains after several gentle attempts, a dedicated oven-glass cleaner may be a better choice than continuing to scrub.
11. Areas Where You Should Be Particularly Careful
Although oven-door glass looks like an ordinary sheet of glass, the door may contain several components that require different care.
Pay attention to:
- Metal trim: Some cleaners may discolour or damage certain finishes.
- Printed markings: Abrasive products can wear away temperature indicators, logos, or decorative markings.
- Rubber seals and gaskets: These should be cleaned according to the manufacturer’s instructions.
- Door seams and vents: Avoid allowing liquid or detergent to run into openings.
- Specially treated glass: Coatings may react differently to abrasive products or strong chemicals.
If your oven has multiple glass panels, don’t attempt to dismantle the door simply to reach a stain between them unless the manufacturer provides clear instructions for doing so.
When in doubt, choose a gentle cleaning method or contact the appliance manufacturer for advice.
12. How Does This Compare With Traditional Oven Cleaner?
Specialist oven cleaners are designed to tackle stubborn grease and burnt-on food residue, although their ingredients and application instructions vary considerably.
Some products require a waiting period before the residue can be wiped away. Others are designed for specific surfaces and must not be used on certain finishes or components.
A dishwasher tablet may seem like a convenient alternative, especially if you already have one at home. However, convenience doesn’t necessarily mean it’s safer or more effective than a purpose-made product.
For routine cleaning, warm water and mild washing-up liquid may be enough. For heavier deposits, an oven-glass cleaner approved by the manufacturer is generally the more reliable choice.
Always follow the label instructions, use appropriate ventilation, and wear protective gloves when required.
13. How Often Should You Clean Your Oven Door?
You don’t need to wait until your oven glass turns dark amber before giving it some attention.
For households that use the oven regularly, checking the door every two to four weeks is a useful starting point. The ideal frequency depends on how often you cook and how much grease or food splatter your meals produce.
If you frequently roast vegetables, bake bubbling casseroles, or cook dishes that tend to overflow, you may need to clean the glass more often.
The real trick is to deal with fresh splashes before they have a chance to bake onto the surface repeatedly.
A quick wipe after the oven has cooled completely can prevent a small cleaning job from becoming a much bigger one.
14. A Simple Maintenance Routine to Keep Glass Clear
Once the glass is clean, a few small habits can help keep it that way.
Wipe away fresh splashes. After the oven has cooled, use a soft, damp cloth to remove grease and food residue before it accumulates.
Use suitable baking trays. Place food in appropriately sized dishes and use a tray beneath items that are likely to bubble over, where practical and safe.
Clean spills promptly. Fresh residue is usually easier to remove than grease that has been exposed to repeated heating.
Avoid unnecessary abrasive cleaning. Frequent aggressive scrubbing can damage the surface rather than improve its appearance.
Follow your oven’s care instructions. Regular maintenance with approved products helps protect the glass and surrounding components.
These small steps can make a noticeable difference without adding another complicated task to your cleaning routine.
15. My Honest Take on This Cleaning Trick
I love a cleaning shortcut that feels realistic for everyday life. Anything that makes a dreaded household chore feel more manageable is worth considering, particularly when you’re juggling work, cooking, errands, and everything else that fills a typical week.
My uncle’s dishwasher tablet trick certainly got me thinking about how much effort we sometimes put into cleaning stubborn oven glass. The broader lesson, though, is that the right cleaning method matters more than how hard you scrub.
A suitable cleaner, a soft cloth, and a little patience can often make a real difference. And when a stain refuses to budge, using a product designed for oven glass is usually a better next step than experimenting with increasingly abrasive methods.
The most useful cleaning hacks aren’t necessarily the most dramatic ones. They’re the ones that save time, work with the materials you’re cleaning, and don’t create another problem in the process.
So, before you spend money on several different products or devote an entire afternoon to scrubbing your oven door, start with a gentle, manufacturer-approved method. You may find that keeping the glass clear is much easier than you expected.
After all, the goal isn’t just a sparkling oven door. It’s finding a simple routine that works in real life and leaves you with more time to enjoy the things you actually want to do.
You’ve just read Simple Trick for Cleaning Oven Door Glass. Why not read Three Chairs & Three Truths